Screenshots and the Element Picker
Capture viewport screenshots, draw a region, or pick a specific page element — with HiDPI awareness and WebP upload. Visual captures land in Glassy as searchable notes.
Before you start
- getting-started/06-capturing-from-the-web
What you'll learn
- Capture a viewport screenshot as a Glassy note
- Use region capture to grab a specific area
- Use the Element Picker to capture a single page component
- Understand how screenshots are stored (WebP) and embedded
- Troubleshoot missing or broken screenshots
Not everything you want to save is text. Dashboards, charts, designs, maps, and visually complex pages resist text extraction. Glassy Companion has three visual capture modes: viewport screenshots, region capture, and the element picker.
Viewport screenshots
A viewport screenshot captures everything currently visible in your browser window.
Click the Screenshot button
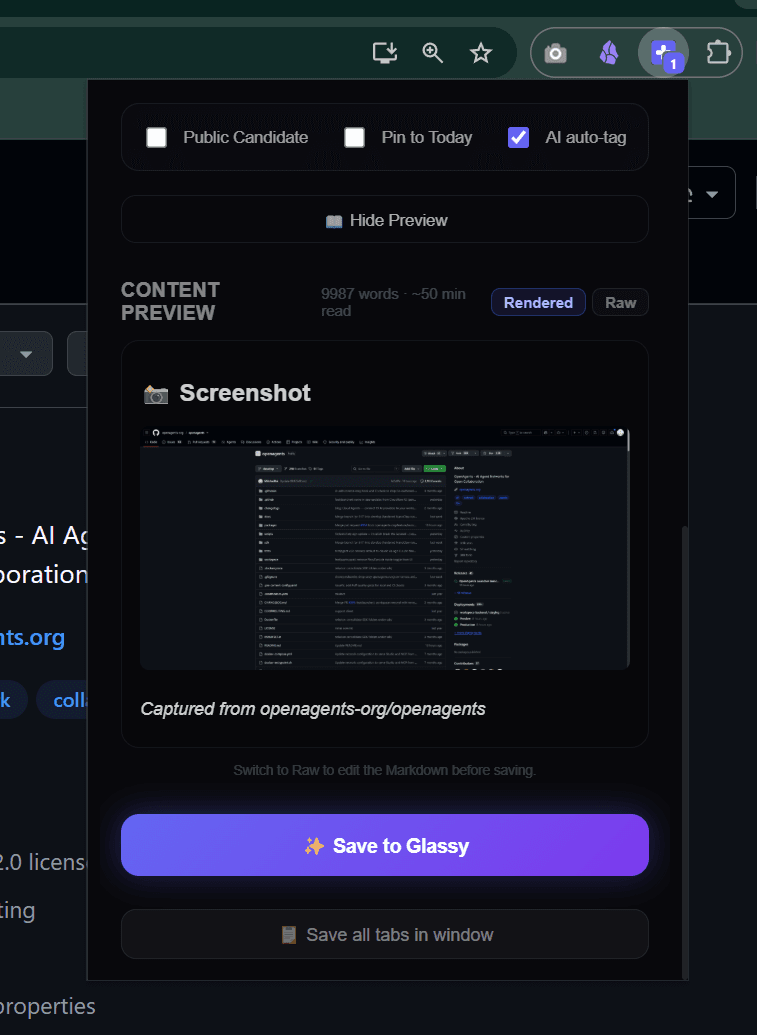
Open the Companion popup and press the Screenshot (📸) button in the toolbar.
Review in Smart capture
The popup auto-expands Smart capture with the captured image pre-loaded. Add a title or note if you want.
Save
Click Save. The viewport is captured as PNG, uploaded to your Glassy server, converted to WebP, and embedded as  in a new note.
Region capture
Region capture lets you draw a rectangle on the page and capture everything inside it — useful for charts, infographics, or partial page content.
Trigger region capture
Use your region capture keyboard shortcut or click the extension icon and choose Capture region.
Draw the selection
An overlay appears. Click and drag to draw a rectangle around the area you want. The rectangle snaps to help with alignment.
Confirm
Release the mouse. The overlay disappears and the selected region is captured and saved as a note.
The Element Picker
The Element Picker lets you click a specific section of a page — a table, a sidebar, a code block, a product card — and capture just that DOM element as rich Markdown (for text) or as a screenshot (for visual).
Trigger the Element Picker
Open the popup and click the Element Picker (target-icon) button.
Hover to highlight
As you move your mouse, individual DOM elements highlight with an outline. The picker walks the DOM tree under your cursor.
Click to capture
Click the highlighted element to capture it. The extracted content appears in the popup for review.
CSS selector persistence
Once you pick an element, Glassy remembers the CSS selector. The next time you open the popup on the same page, the Element Picker pre-targets the same element. This is ideal for capturing a recurring section — a live pricing table, a dashboard metric, a news widget — without re-clicking every time.
HiDPI: crisp screenshots on Retina displays
On high-DPI displays (Retina, 4K), each CSS pixel maps to multiple physical pixels. Glassy Companion handles this correctly:
- The extension reads your device pixel ratio (DPR) — typically 2 on Retina
- The capture rectangle is scaled by DPR before cropping
- The rectangle is clamped to image bounds to prevent overflow
- The result is full physical resolution — crisp and detailed
A 800×400 CSS rectangle on a 2x DPR display produces a 1600×800 pixel screenshot.
Self-hosted instances
If you use a self-hosted Glassy server, screenshots are uploaded to your server — not to app.glassy.fyi. The embed URL points to your instance. This means:
- Screenshots are stored under your control
- They require your server to be online to render in the note
- Per-account storage limits are managed by your server’s configuration
Troubleshooting
Screenshot shows a broken image link
The most common cause is that the screenshot was captured while your server was offline. The text portion of the capture was saved to the offline queue and synced later, but the image upload was attempted at capture time and failed.
Fix: Re-capture the page when your server is online.
Screenshot captures the wrong frame
If you switch tabs just as you click Save, the screenshot may capture the wrong tab. The extension captures the active tab at the moment you press Save. Make sure the correct tab is focused.
Element Picker not highlighting
Some sites use shadow DOM or complex CSS that can interfere with element detection. Try region capture as a fallback. Cross-origin iframes cannot be inspected due to browser security — use region capture for those.
What’s next?
Now you can capture text and visuals. Next, understand the difference between bookmarks, notes, and captures — and when to use each.